Card and Label Maker Application designs personalized ID cards, security cards, postcards, clothing labels, address labels, coupons, etc. in a time-saving as well as cost-effective manner. Software generates exclusive cards that hold different information such as sale offers, barcodes, website links, contact numbers, referral codes, etc. Program has a password protection feature that enables you to secure your created card from unwanted user access. Software contains a detailed help section that assists you to understand the functionalities and services of the software very easily without any professional guidance or support.
Card and Label Creating Software has a large collection of inbuilt library images of various categories like healthcare, manufacturer, publishing, banking, retail, etc. that helps the user to make their card more attractive and stylish. Application provides the facility to create multiple cards with distinct text and barcode values with the help of an advanced dataset feature. Software can also export your designed card in Bitmap, JPG, ICON, PNG, EXIF, and many other file formats.
Steps to create and print high-quality cards using DRPU Card and Label Designer Software
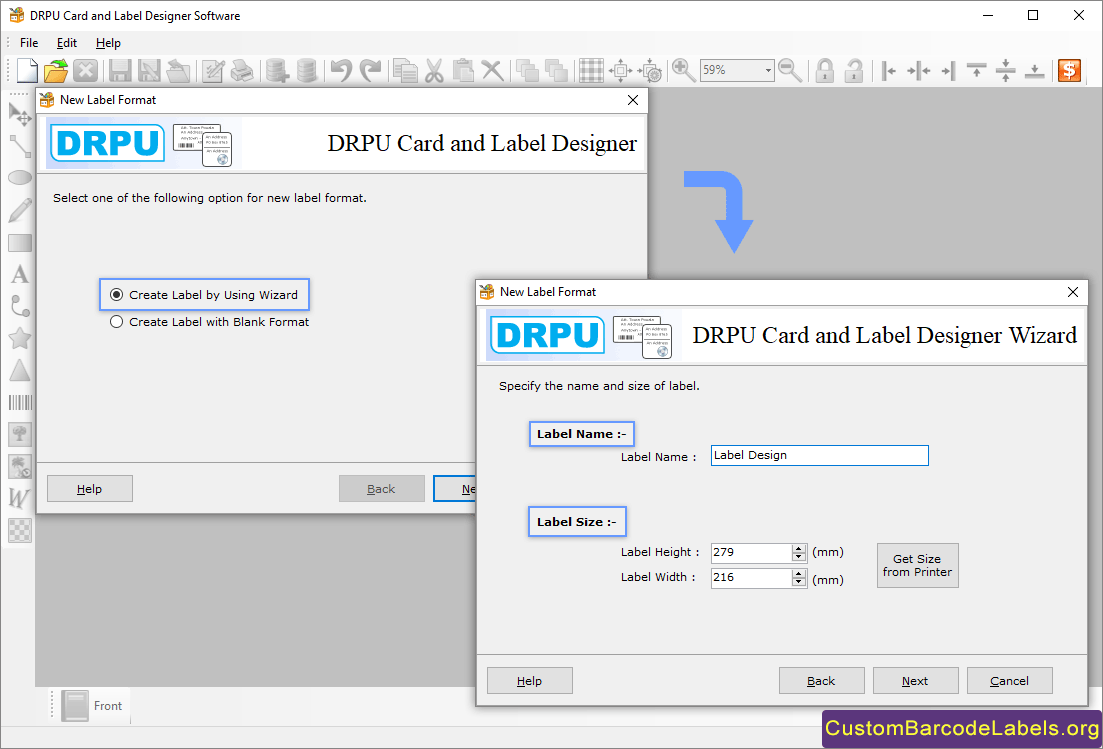
Step 1: Make a New Label Format by using Wizard option
- Select the Create Label by Using Wizard option to make a new label format (You can also select the blank format option).
- Change the label size (width and height), label name, and type of fold (postcard, half fold, and quarter fold).
- Select a specific label shape like ellipse, rectangle, rounded rectangle, or CD/DVD and click Next.
- Change the color and background settings of the label such as solid color, gradient, image, or style (fill style, pen color, and background color).
- Set a unique password to provide security to your designed card and then click Finish (you can also remove the created password).

Step 2: Change the Text Properties of the Card
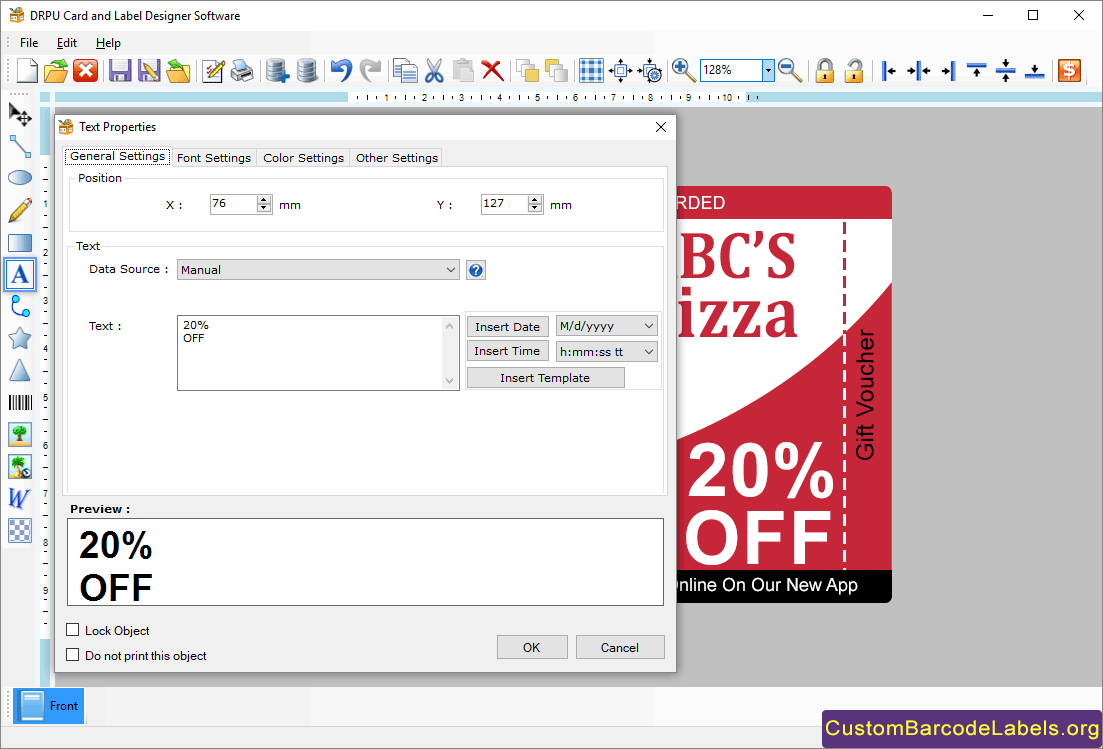
- Insert the text into your card by selecting the Text icon from the left panel. Double-click on the text to change the Text Properties.
- In general settings, change the X position, Y position, and data source. You also insert data, time, and template in the text field.
- In font settings, change the font family, font style, and font size. You can also enable the strikeout and underline attributes.
- In color settings, change the fore color (gradient or solid color) as well as the back color (solid brush, gradient, or set transparent).
- In other settings, rotate the text at any angle, and also add a border around the text by selecting the show border option.

Step 3: Print the Customized Card
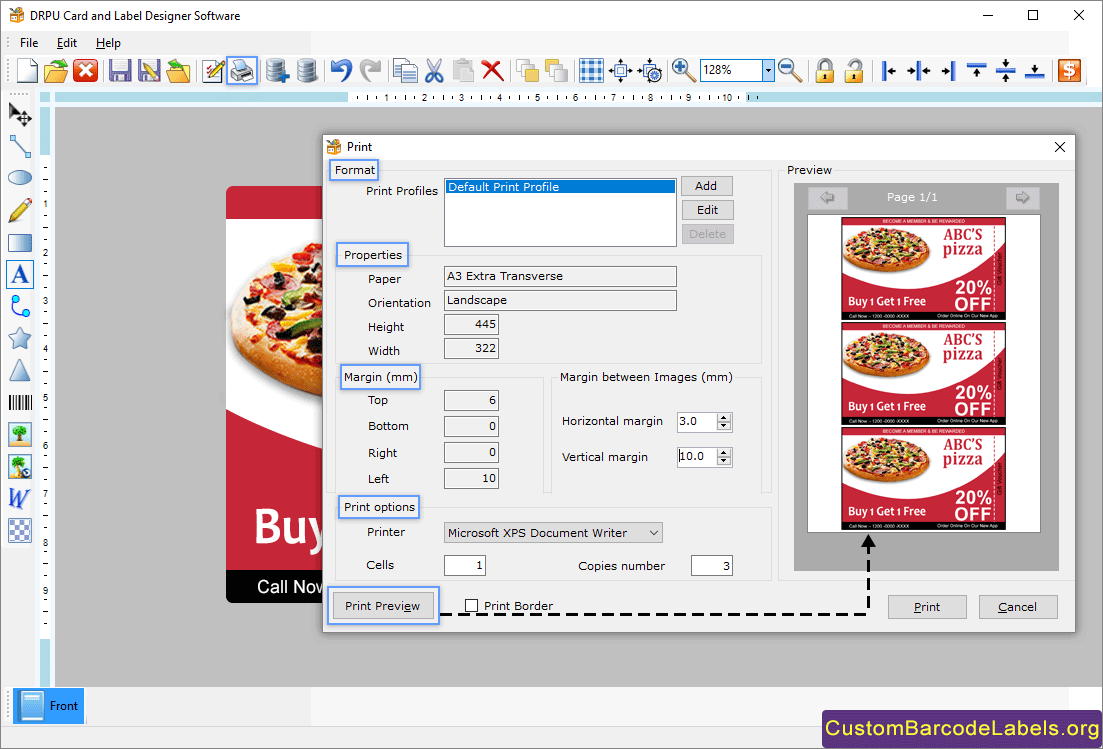
- Print your designed card by selecting the print option or simply press Ctrl + P shortcut key and modify various print settings.
- Click on Edit print profile and change the page properties like paper size, margins, and orientation.
- Change the margin between images (horizontal and vertical), printer type, number of cells, and copies number.
- Select the Print Preview option to fix all the printing errors and finally, click on the Print button to print your created card.
