Logo Maker Software generates amazing logos by using predefined template samples for various businesses and organizations. Application creates logos in different categories such as construction, books, sports, marketing, etc. Software has an advanced screen capture option that allows the user to capture a specific part of the computer screen and add it to their designed logo. Program facilitates the user to export their designed logos in the template, image, or pdf format.
Advanced Logo Creating Application can also create some other branding things like brochures, cover photos, advertisements, promotional posters, etc. Software enables the user to undo or redo their designing steps to avoid mistakes during logo making process. Software is integrated with an advanced print setting feature that allows the user to print personalized logos in high quality with the help of any kind of printer.
Follow the below steps to create customized logos using Logo Maker Software
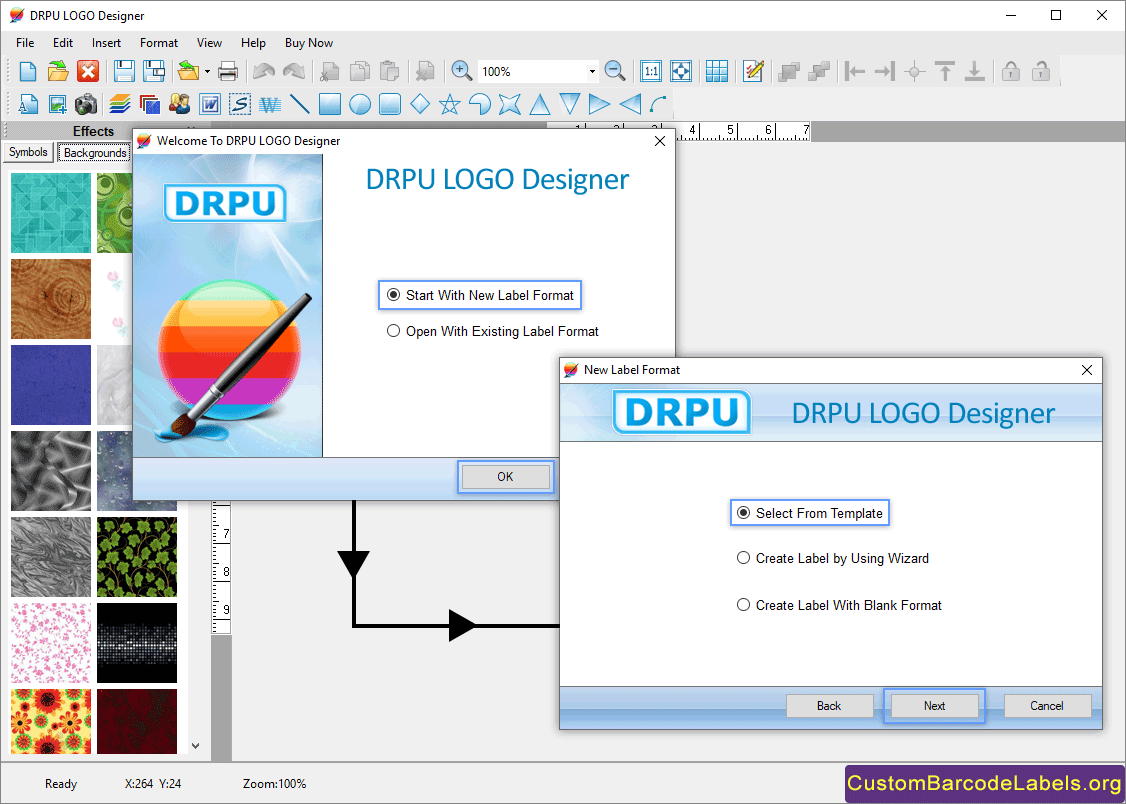
Step 1: Select the New Label Format
- Open the software and create a logo by selecting Start With New Label Format or Open With Existing Label Format option.
- Choose a New Label Format, Select from Template, Create Label by Using Wizard, or Create Label with Blank Format (Here, we choose Select from Template option.)
- Now, choose the predefined logo category, add background, add color, or create your own custom logo.

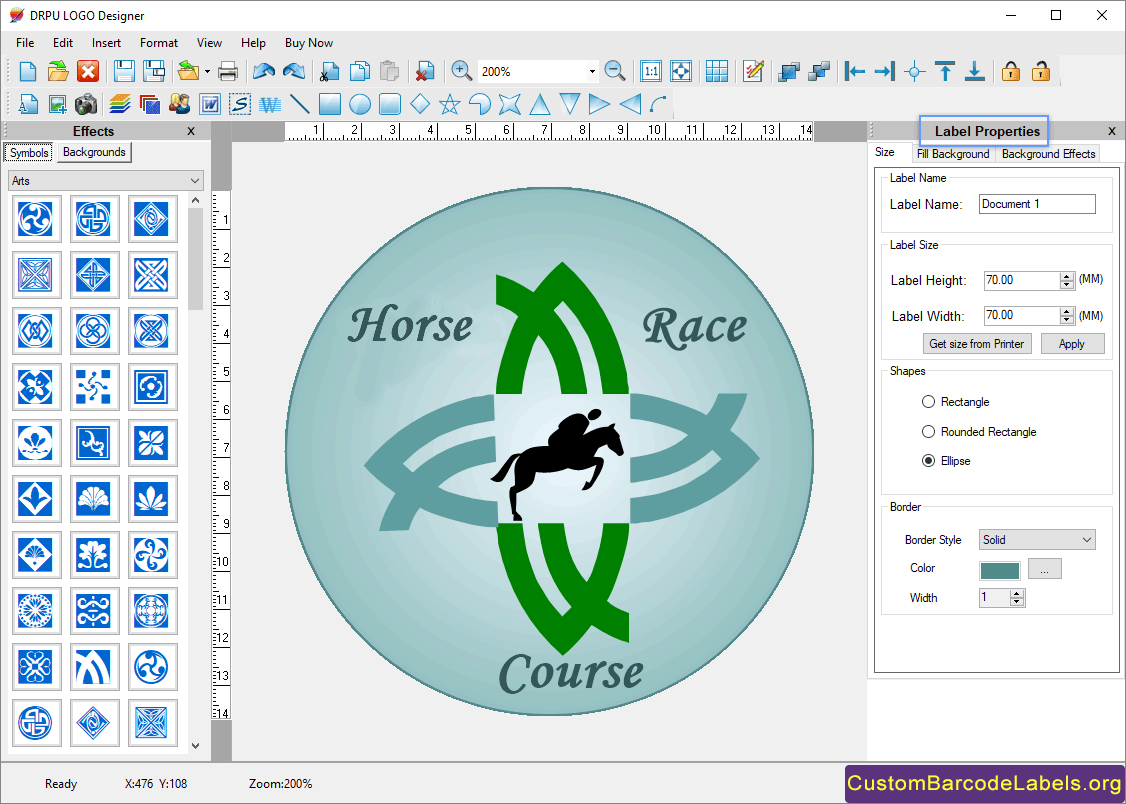
Step 2: Change the Label Properties of your Logo
- Customize your logo by using different drawing tools like watermark, image, background, line, signature, etc.
- Go to label properties, and change the size, fill background, and background effects property.
- In size property, change label name, label dimension, label shape, and border.
- In fill background property, change the solid color, fill gradient, fill style, or fill image, of the logo background.
- In background effects property, change the brightness, contrast, hue, and saturation of logo background.

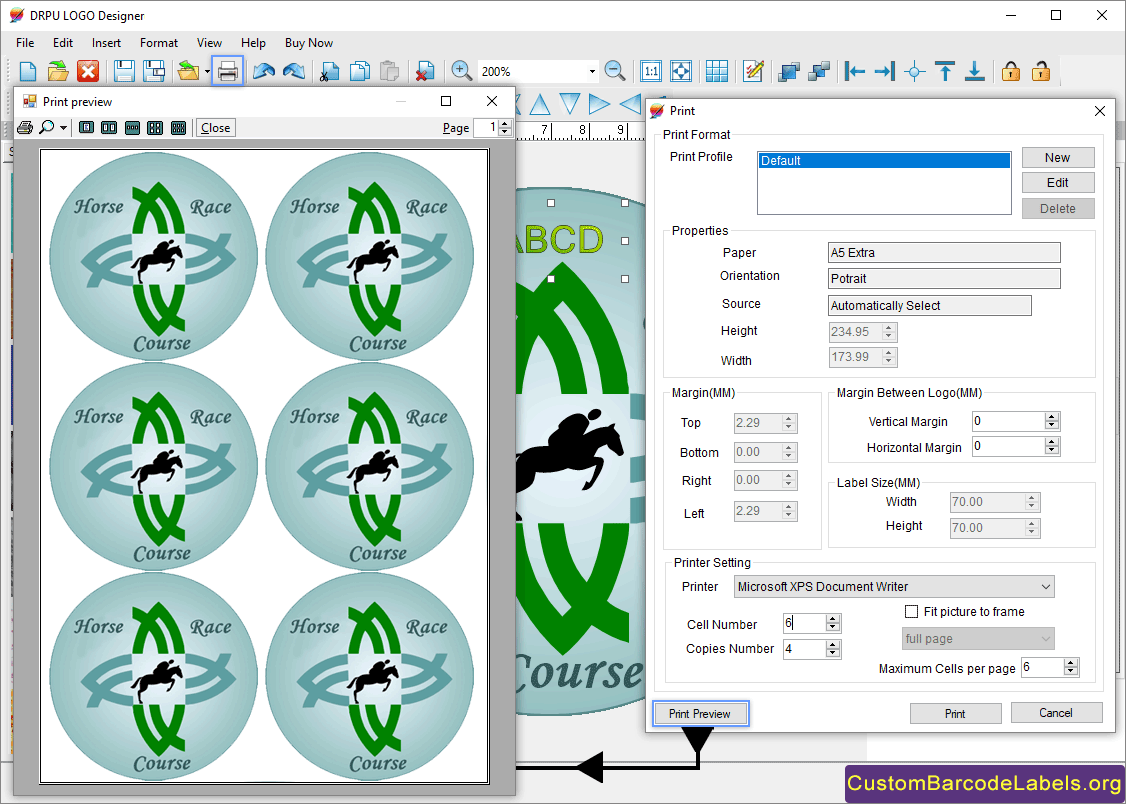
Step 3: Print the Designed Logo
- Click on Print icon to start the printing process of your designed logo.
- Change the various print settings like page properties, page margins, margin between logo, printer type, cell number, etc.
- Finally, click on print button to print the designed logo.
- You can also select print preview option to see the preview of your designed logo print page.
