Barcode Labels Software makes custom barcodes in a very simple and easy way to fulfill the labeling needs of healthcare industries. Software creates high-quality barcode labels for medical equipment, healthcare devices, medicines, blood bags, medical test tubes, etc. Barcode Making Application is mainly used in nursing homes, pharmaceutical centers, hospitals, private clinics, blood banks, and various other healthcare applications.
Barcode Maker Software creates linear and 2d barcode labels in different shapes and sizes according to the requirement of healthcare professionals. Software provides a user-friendly GUI that helps novice users to create the barcode labels easily without any need for technical knowledge. Application provides the facility to create multiple medical barcode lists by using a Batch Processing option. Software allows the user to save their designed barcode images in jpeg, bitmap, wmf, exif, gif, and several other file formats. Program can print bulk-designed barcode labels on a single page by using any kind of barcode printer.
Follow the below steps to create barcode labels using Barcode Software for Healthcare Industry
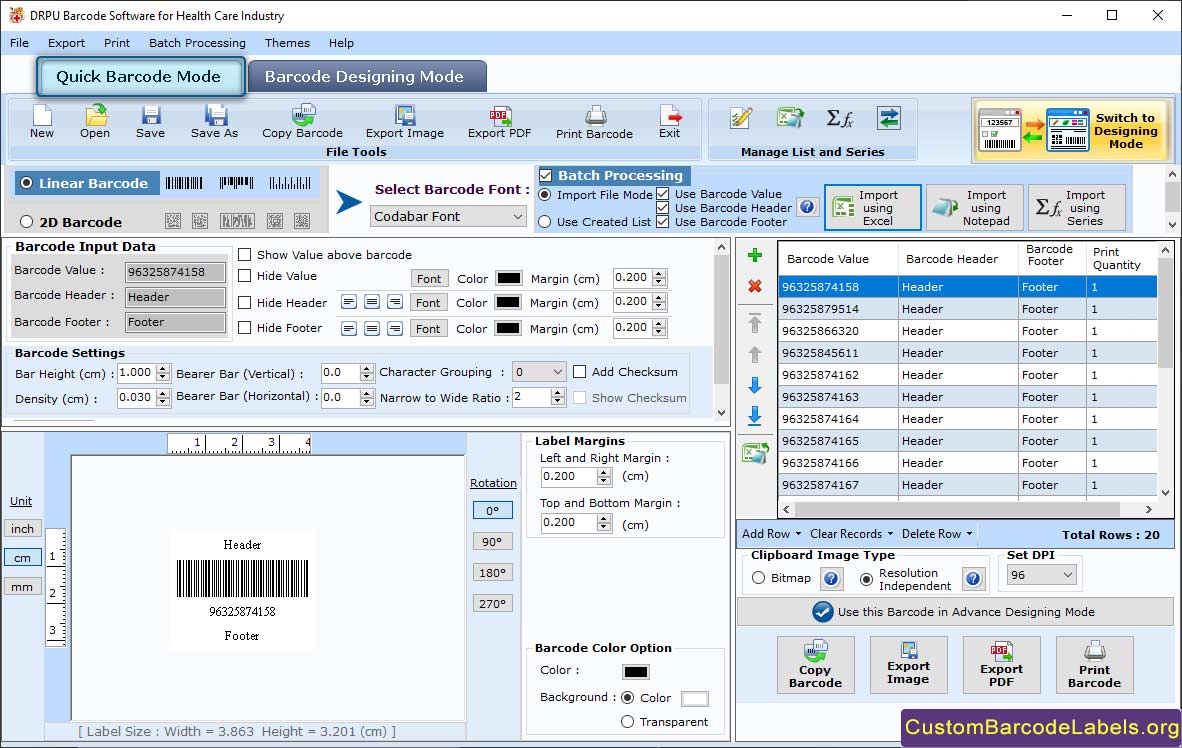
Step 1: Create Barcode Font in Quick Barcode Mode
- Select the barcode technology and type (here we select Codabar barcode font) in the quick barcode mode.
- Change various barcode properties including barcode value, barcode header, barcode footer, show header, show footer, bar height, and density.
- Change different barcode settings like color and font.
- Enable the batch processing feature to create multiple copies of barcode fonts with different values.
- Select the Use Created List option and create a new data list or import the existing data list from an excel file or text file.

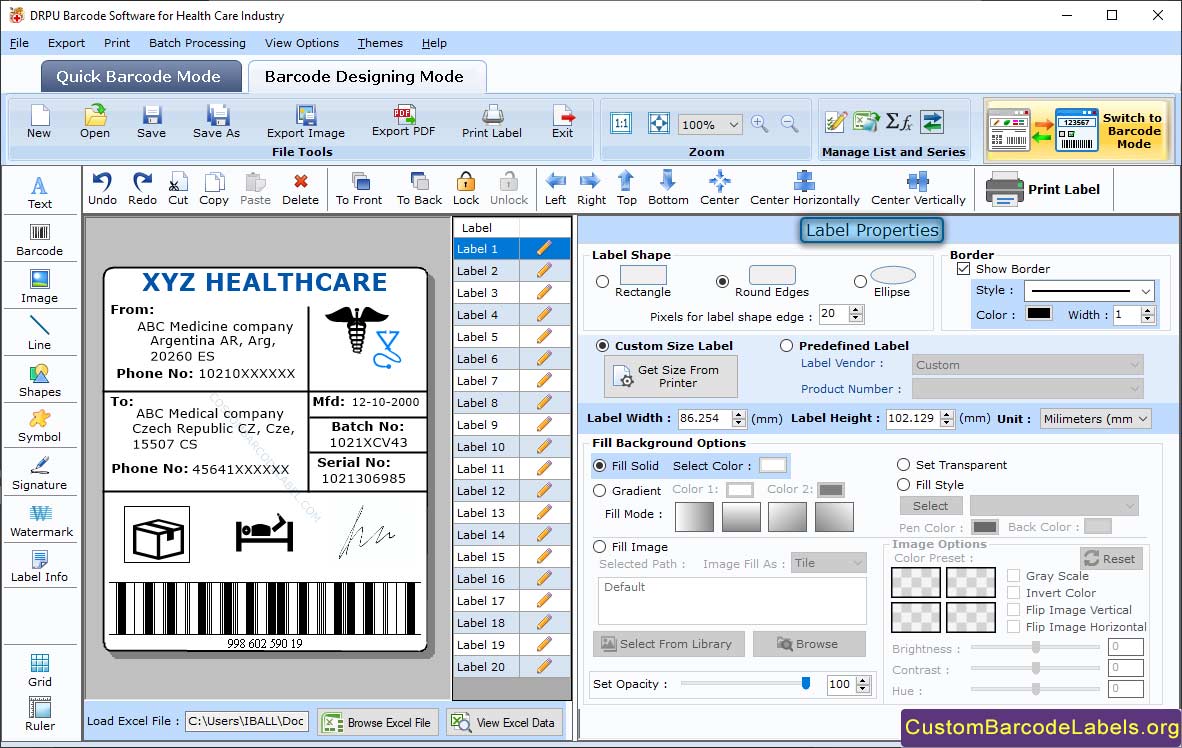
Step 2:Create Barcode Label in Barcode Designing Mode
- Customize the healthcare barcode label with the help of several drawing tools like text, watermark, barcode, signature, image, etc.
- Go to the Label properties and change the label width, fill background options, and image options.
- Create the label in rectangle, round edges, or ellipse shape. Change the label size, border, height and unit(mm).
- Fill Background Options: Set the color of the label card in solid brush, gradient, or different fill style. Set the background image (predefined or custom) in the card.
- Image Options: Change the brightness, hue, contrast, gray scale, and invert color of the inserted image. You can also flip the image in vertical or horizontal direction.

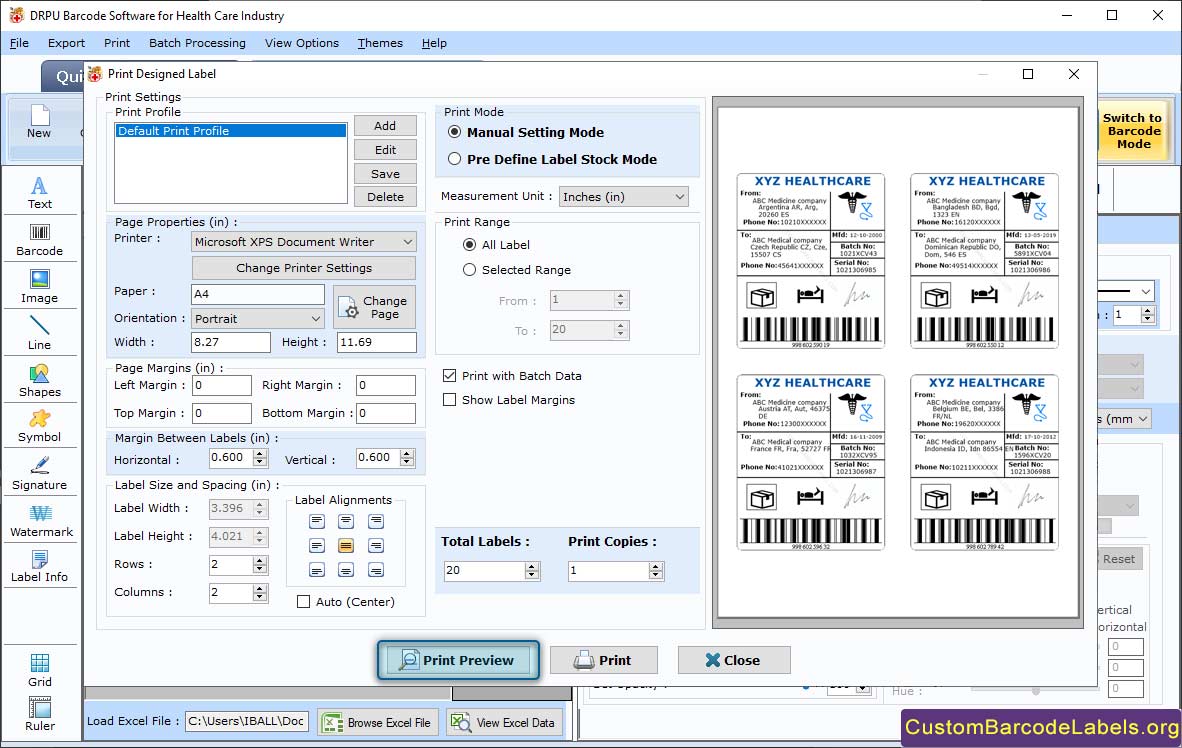
Step 3: Print the Designed Barcode Label
- Select the print icon from toolbar to print your created medical barcode label. Choose any one print mode, Pre Define Label Stock or Manual.
- Change the different page properties such as printer type, print paper, page width, page height, and orientation.
- Set the page margins (left, right, top, and bottom) and margin between labels (horizontal or vertical).
- Choose the maximum labels per page, copies number, and total labels.
- Click on Print button to start the printing procedure of created barcode label. You can also click on Print Preview button to avoid all the printing issues.
