Barcode Labels Application creates bulk quantities of barcodes by using the batch processing series option for managing the inventory details in retail businesses. Software consists of different kinds of drawing tools including watermark, signature, image, barcode, shapes, text, etc. to customize the inventory and retail barcode labels. Application facilitates the user to export their designed retail barcode labels in pdf as well as image file formats (including wmf, gif, exif, jpeg, etc).
Software allows the user to integrate their created inventory barcode labels into many Microsoft Windows Applications like MS Word, MS Excel, and MS Paint. Program has sequential, constant value, and random series generating options that enable the user to generate multiple copies of barcodes with different header, footer, and barcode values which are valuable for all retail business organizations. Inventory Control Barcode Software is compact in size and an easy-to-use application that doesn't require any internet connection to create and print barcode labels.
Follow the below steps to create barcodes using Barcode Software for Inventory Control and Retail Business
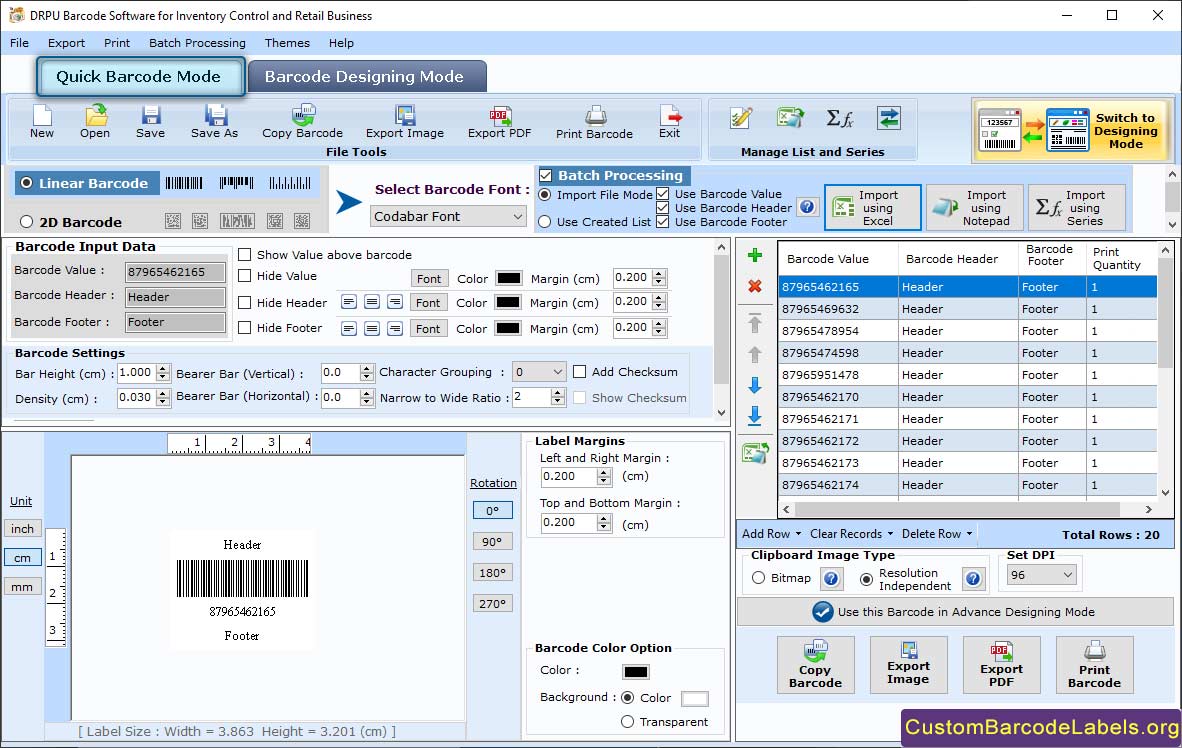
Step 1: Create Retail Barcode Font in Quick Barcode Mode
- Click on Linear barcode option and select Codabar barcode font as shown in the below screenshot.
- Modify the barcode value, barcode header, barcode footer, hide footer, hide header of Codabar font.
- Change the header margin, footer margin, left and right margin, top and bottom margin.
- Change the barcode header font and barcode footer font.
- Change the barcode color, barcode header color, barcode footer color, and barcode background color.
- Select clipboard image type (resolution independent metafile or bitmap), and change the Image DPI as well as Orientation in the image settings option.

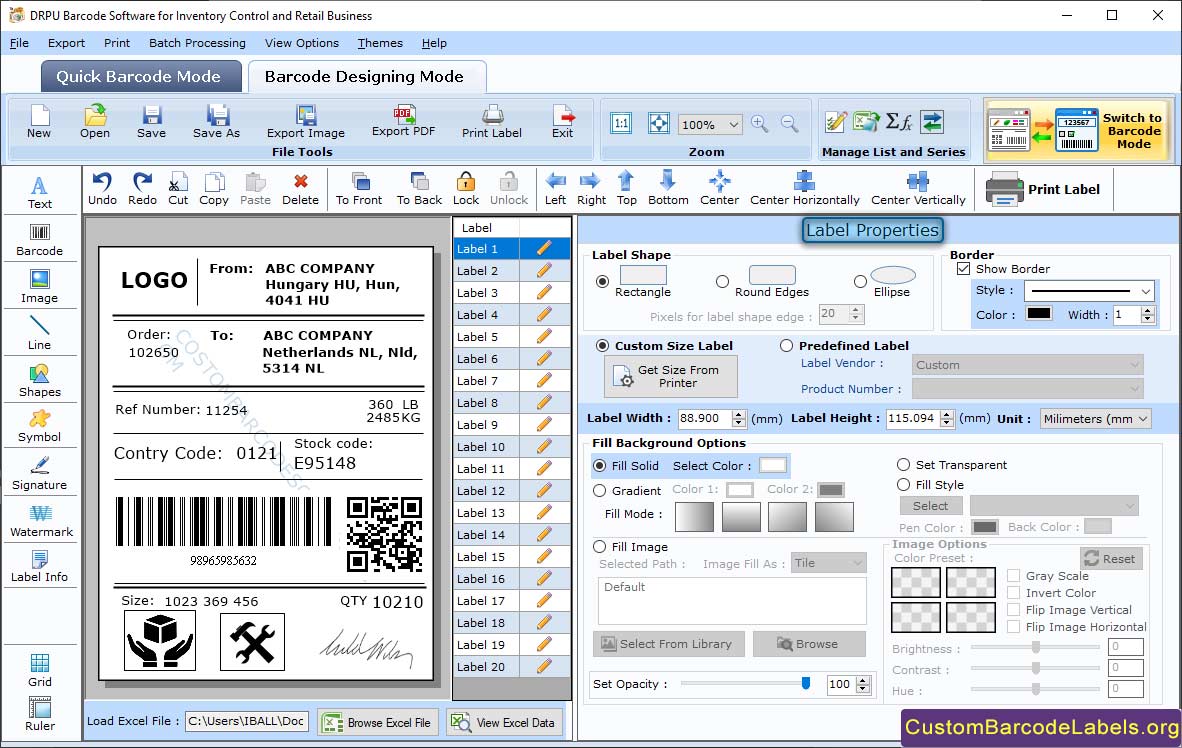
Step 2: Design Retail Barcode Label in Barcode Designing Mode
- With the help of the tools, design the retail barcode label in barcode designing mode as shown in the below screenshot.
- You will see different label properties like fill background, and image processing on the right-side panel of software screen.
- Modify label shape (rectangle, round edges, or ellipse), height, width, and border in the label property.
- Give a solid color, gradient, or any different color style to the card in the fill background property. You can also set prefined or custom image in the card background.
- Change the appearance of the inserted image by adjusting the contrast, hue, brightness, gray scale, and invert color in the image options.

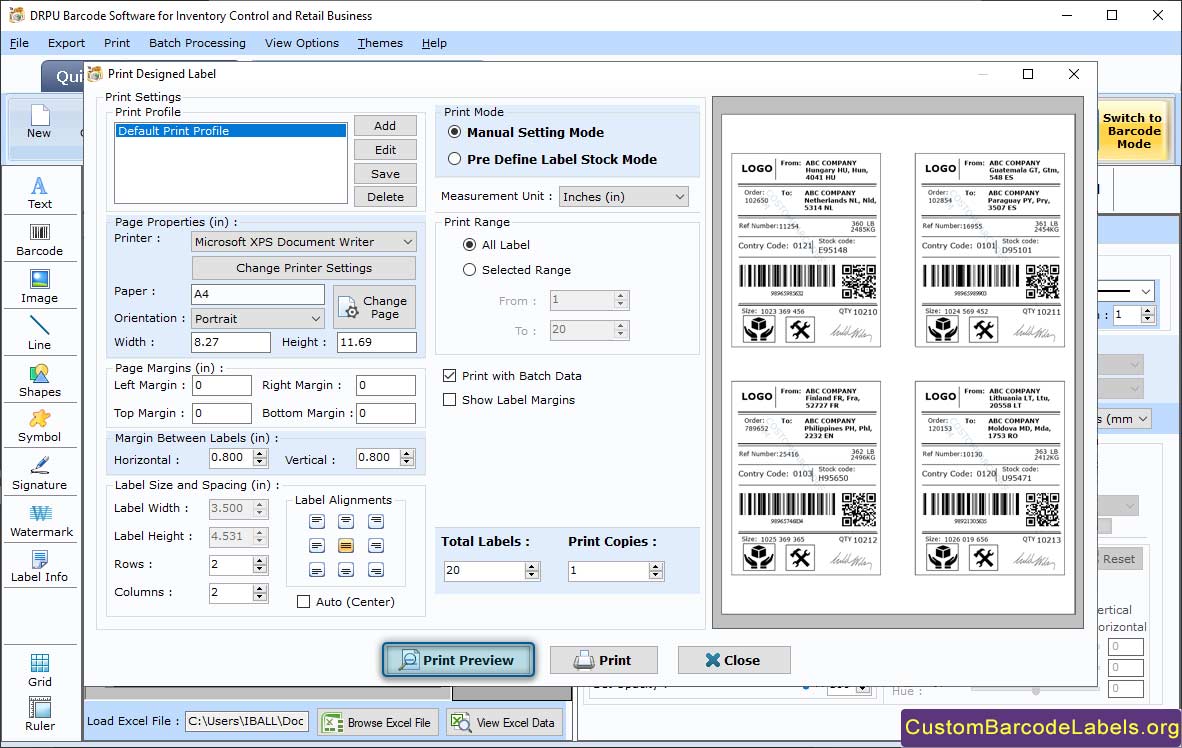
Step 3: Print the Created Retail Barcode Label
- Click on the print icon in standard tools option to print your designed retail barcode label.
- Select Manual mode and modify different print settings including page properties, page margins, and margin between labels.
- Page Properties: Change the printer type, paper type, orientation, width, and height of the page.
- Page Margins and Margin Between Labels: Modify the left, top, right, and bottom margins of the page as well as vertical and horizontal margins between labels.
- Card Size: The card size is fixed at the time of printing, you have to change it while designing the barcode label.
- Print and Print Preview: At last, click on print button to start the label printing process. You can also see the preview of your designed retail barcode label by selecting the Print Preview option.
