Barcode Label Maker designs unique barcode labels by using different 2d and linear barcode fonts to meet the post offices and bank's labeling requirements. Software creates barcodes that are used in the labeling of demand drafts, letters, passbooks, postal mail, cheques, envelopes, and many other postal or banking documents. Postal Barcode Generating Application works with all the major windows versions like Windows 11, Windows 10, Windows 8.1, Windows 8, Windows 7, etc.
Software generates multiple postal and bank barcode lists with the help of constant values, sequential, and random series generating options. Software facilitates the user to save their created postal barcode labels in the bitmap, tiff, jpeg, exif, gif, pdf, and many other file formats. Program offers a very basic and clean user interface that enables beginners to operate the software without any technical guidance or knowledge.
Follow the below steps to generate barcode labels using Barcode Software for Post Offices and Banks
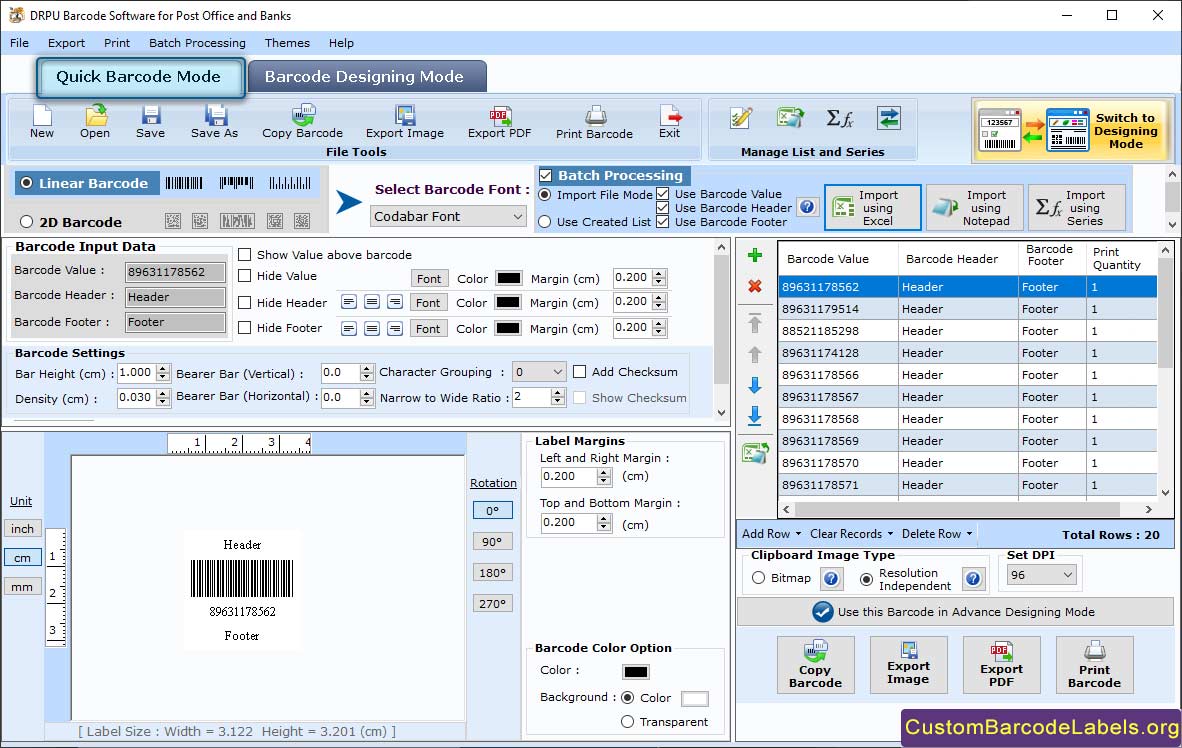
Step 1: Make the Postal Barcode Font in Quick Barcode Mode
- Go to the quick barcode mode, click on linear barcode option, and select Planet barcode font (mainly used for postal services).
- Here, you can change several barcode properties like bar height, density, align header, align footer, barcode header, barcode footer, and barcode value.
- Change settings like bearer bar, character grouping, narrow to wide ratio, etc. Similarly, you can also change the image, color, and font.
- Click on enable batch processing checkbox, and select use created list option to generate bulk planet barcode fonts with different texts and values.
- Add your created list (here we make letter barcode list) in the barcode value, barcode header, and barcode footer.

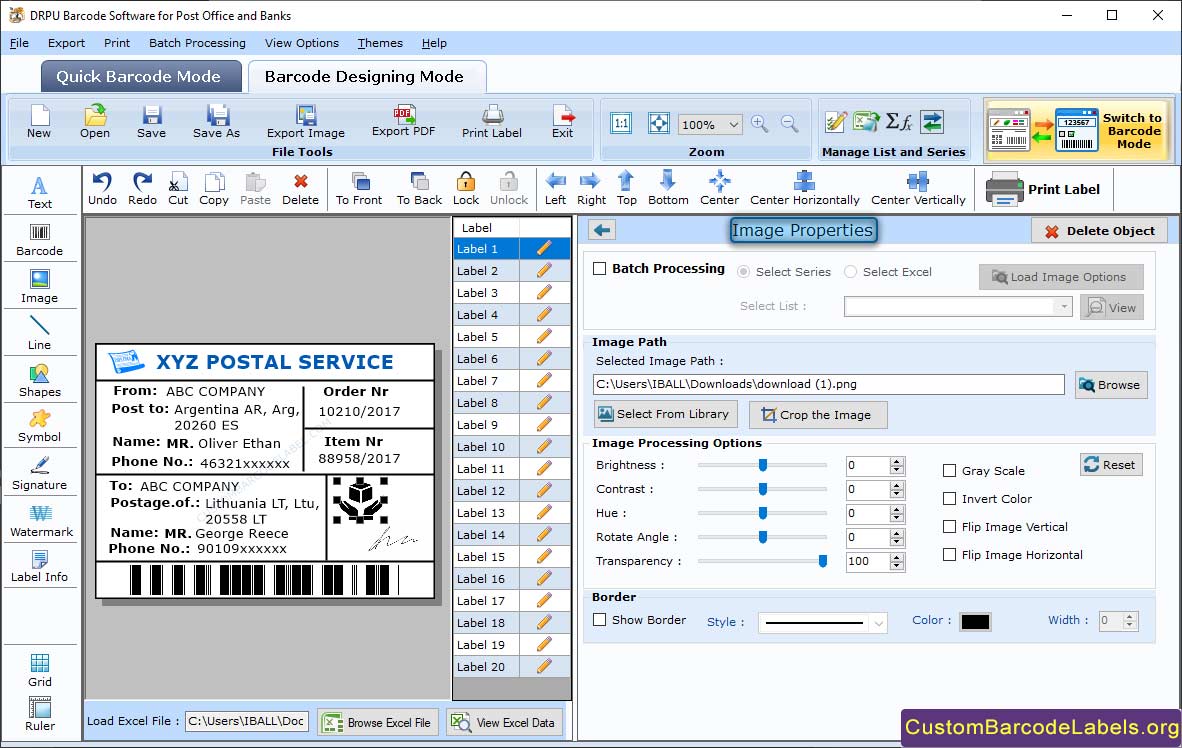
Step 2: Create the Postal Barcode Label in Barcode Designing Mode and Change the Image Properties
- In barcode designing mode, create a new postal barcode label by using text, image, watermark, custom shapes, library images, and many other drawing tools.
- To change the image properties, select the image inserted in the label, and change the settings in the image properties section.
- Change the image processing options like contrast, hue, brightness, rotate angle, etc. You can also change the picture by selecting another image from library or browsing from PC
- Other Settings: Select the Show Border option to display a border around the picture. You can also change the border style, border color, and border width.

Step 3: Print the Designed Postal Barcode Label
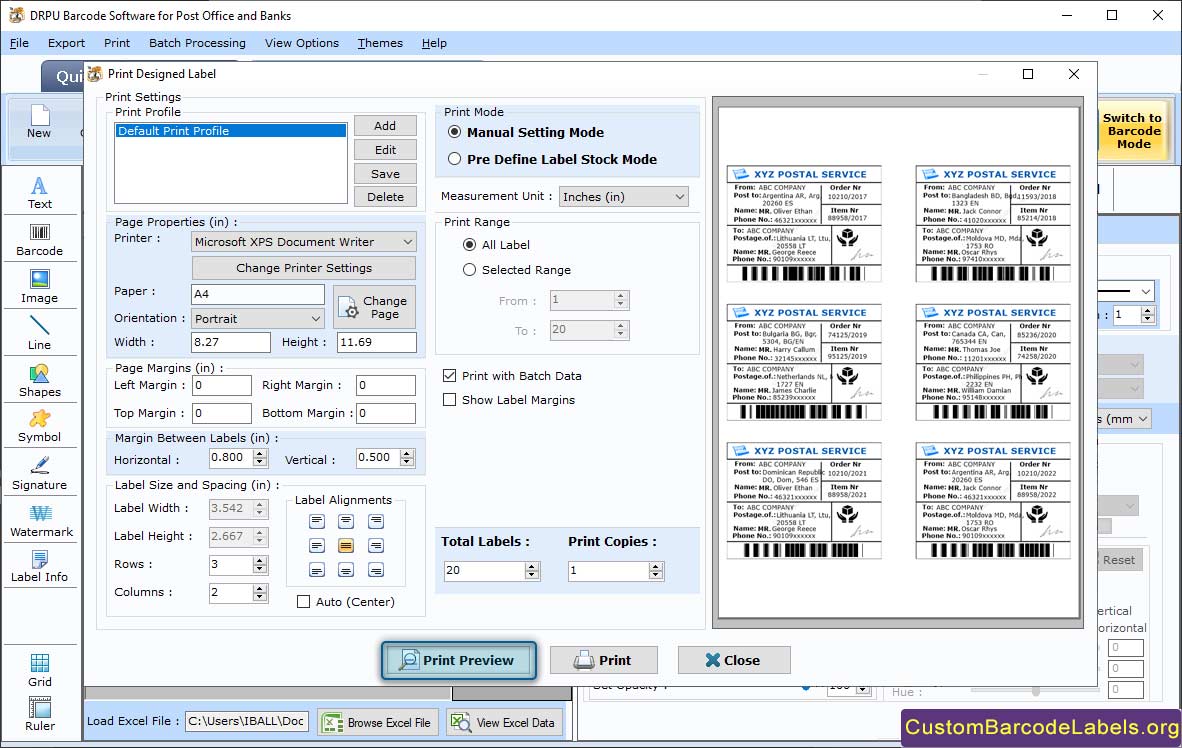
- Click on the print icon from standard toolbar, and a print window appears on the screen as shown in the below screenshot.
- Choose the manual print mode and change different print settings like page properties, margin between labels, and page margins.
- Change the paper type, height, width, orientation, and printer type in the page properties section.
- Change the bottom, right, top, and left margins in the page margins section.
- Change the horizontal and vertical margins between labels, maximum labels per page, total labels, and copies number.
- Select the print button to print your postal barcode label. You can also select the print preview button to view your created barcode labels page before printing.
